The Timeless Elegance of Velvet Ribbons

  • Velvet ribbons are synonymous with luxury and timeless elegance. Known for their soft texture, rich colors, and versatile uses, these ribbons have been a favorite for centuries in fashion, décor, and crafting. Whether you’re looking to add a touch of sophistication to a gift or elevate your DIY projects, velvet ribbons are the perfect choice.

The Allure of Velvet Ribbons

Velvet ribbons stand out due to their plush texture and subtle sheen, making them a go-to material for projects requiring an elegant finish. Made from silk, polyester, or cotton, they are available in various widths, colors, and finishes, catering to every need and style.

Creative Uses for Velvet Ribbons

Here are some ways to incorporate velvet ribbons into your projects:

1. Gift Wrapping

A velvet ribbon wrapped around a box instantly transforms a simple gift into a luxurious present. Pair it with kraft paper or metallic wrapping for an even more sophisticated look.

2. Fashion and Accessories

Velvet ribbons are popular in fashion for chokers, headbands, and belts. They’re also used as accents on dresses, jackets, or shoes, adding a vintage-inspired charm.

3. Home Décor

Use velvet ribbons to tie back curtains, embellish pillows, or decorate wreaths for a warm and elegant touch. They’re especially popular in holiday décor for their festive appeal.

4. Crafting and Scrapbooking

Velvet ribbons can elevate DIY projects, from handmade cards to scrapbook pages. Their texture adds depth and interest to your designs.

5. Wedding Décor

Velvet ribbons are a favorite in wedding décor. They’re often used to wrap bouquets, adorn invitations, or as chair sashes, creating a romantic and timeless aesthetic.

Tips for Working with Velvet Ribbons

  • Choose the Right Width: Narrow ribbons work well for delicate details, while wider ones are ideal for bold accents.
  • Combine Textures: Pair velvet with contrasting materials like satin, lace, or burlap for an intriguing mix.
  • Care for Your Ribbons: Store velvet ribbons rolled to prevent creases and keep them looking their best.
  • Secure Properly: Use fabric glue or sewing to secure velvet ribbons in place, as their smooth texture can make them prone to slipping.

Where to Buy Velvet Ribbons

Looking to get started with velvet ribbons for your next project? Visit https://hellohomesng.com/product/velvet-ribbons/ for a wide selection of high-quality velvet ribbons in various colors, widths, and finishes.

Velvet ribbons are more than just a decorative material; they’re a statement of elegance and luxury. Whether used in fashion, crafting, or home décor, these versatile ribbons bring a touch of sophistication to any project. Start experimenting with velvet ribbons today and let their timeless charm inspire your creativity.

Visit https://hellohomesng.com/product/velvet-ribbons/ to explore premium velvet ribbons that match your style and vision

Complete Your Space: Choosing the Perfect 5-Piece Living Room Furniture Set

Complete Your Space: Choosing the Perfect 5-Piece Living Room Furniture Set

A well-coordinated living room set can instantly transform your space, providing style, comfort, and cohesion. For many homeowners, a 7-piece living room furniture set offers the perfect balance—giving you a versatile selection of seating and surfaces that make designing a beautiful, functional space easy. Here’s everything you need to know about 7-piece living room sets, including tips on choosing the right set for your style and needs.

Why Choose a 5-Piece Living Room Set?

A 7-piece furniture set is a fantastic option if you want a cohesive, all-in-one look for your living room. Typically, these sets include essentials like a sofa, loveseat, accent chairs, a coffee table, and matching side tables. Some may also feature a console table or ottoman, giving you a well-rounded assortment of furniture that’s easy to arrange in your space. Here are some advantages:

  • Easy coordination: No need to worry about matching styles or finishes since each piece is designed to complement the others.
  • Cost-effective: Buying a complete set is often more affordable than purchasing each item individually.
  • Balanced design: A 7-piece set ensures you have a mix of seating and surfaces, creating a well-rounded living room layout.

What’s Included in a Typical 7-Piece Set?

Each 5-piece set is unique, but common components include:

  1. Sofa: The centerpiece, providing ample seating.
  2. Loveseat: A smaller sofa ideal for extra seating or for smaller spaces.
  3. Accent Chairs: Adds flexibility in seating arrangement and style.
  4. Coffee Table: Central surface for gathering, drinks, and decor.
  5. End Tables (2): Completes the setup for lamps, books, or decorative items.

Some sets may offer variations like an ottoman, sectional seating, or extra side tables. Make sure to check the specific items included so you can select the perfect arrangement for your room.

How to Choose the Right 5-Piece Living Room Set

1. Consider Your Living Room’s Size and Layout

Before you decide on a set, take measurements of your living room. Consider the arrangement you envision—whether you want a classic setup with a sofa against a wall or a more open, conversational layout. Make sure to leave enough space around furniture for movement.

2. Pick a Style That Complements Your Home Decor

Living room furniture sets come in various styles, from contemporary and mid-century modern to rustic and traditional. Think about the overall aesthetic of your home and choose a set that enhances it. For a modern look, opt for sleek lines and neutral colors. If you prefer a more classic style, choose a set with plush seating and rich wood finishes.

3. Focus on Comfort and Material Quality

Since your living room is a space for relaxation and gathering, comfort is key. Look for a set with high-quality upholstery, such as linen, leather, or microfiber, depending on your style preferences. Durable fabrics and solid wood or metal frames ensure longevity, making your investment worthwhile.

4. Think About Color and Texture

Color can impact the mood of your living room. Neutral tones create a versatile base, allowing you to add colorful accents with cushions or throws. For a bolder look, choose a set in a vibrant shade or with texture-rich fabric, like velvet. Consider how each piece will complement or contrast with your walls and flooring.

5. Look for Storage Options

If you’re short on storage, consider a set that includes functional pieces like an ottoman with hidden storage or tables with shelves. These features keep your living space tidy while providing room to store blankets, remote controls, or magazines.

Benefits of Investing in a 5-Piece Living Room Set

Choosing a 5-piece set brings numerous benefits beyond style and convenience:

  • Ease of Setup: With a full set, you won’t have to spend time piecing together individual items to create a unified look.
  • Timeless Investment: High-quality sets are built to last, making them a long-term investment for your home.
  • Enhanced Comfort: Coordinated seating offers multiple seating options, ideal for gatherings or family relaxation.

Top Picks: Recommended 5-Piece Living Room Sets

Ready to find your perfect 5-piece set? Browse our top picks of living room furniture sets here and explore a range of styles and options to suit any home.

A 5-piece living room set is an excellent way to achieve a balanced, stylish space without the hassle of mixing and matching individual items. By choosing a set that suits your style, space, and comfort needs, you’ll create a living room that’s both beautiful and functional—a place where everyone can gather and enjoy.

Looking for the perfect 5-piece set? Explore our curated selection of living room furniture sets and find the ideal fit for your home!

Stylish Ideas for Decorating a Small Kitchen

Stylish Ideas for Decorating a Small Kitchen

Decorating a small kitchen can be both a creative challenge and an opportunity to transform a compact space into a stylish, functional part of your home. With the right decor and storage solutions, even the smallest kitchen can feel open, organized, and inspiring. Here are some top tips and ideas to help you make the most of your kitchen’s layout and add personality, no matter the size.

1. Embrace Vertical Storage

In a small kitchen, vertical space is invaluable. Install floating shelves, magnetic knife strips, or hanging racks to keep countertops clear and make use of every inch. Floating shelves add storage for dishes, jars, and even decor items without taking up floor space, keeping your kitchen organized and visually open.

2. Choose Multi-Functional Furniture

For a small kitchen, select furniture that can serve multiple purposes. A compact kitchen island or rolling cart can act as extra counter space, a prep station, and even seating if you tuck stools underneath. Foldable or stackable chairs are ideal for small spaces and can be put away when not needed.

3. Add Bright Colors and Reflective Surfaces

To create a sense of openness, use light colors like white, cream, or pastel shades on walls and cabinetry. Reflective surfaces, such as glass tile backsplashes or glossy cabinet finishes, can make the space appear larger by bouncing light around. Adding a mirror on one wall can also give an illusion of a bigger kitchen.

4. Decorate with Open Shelving

Open shelving not only provides additional storage but also offers a space to display decorative items like plants, stylish bowls, or small artwork. Choose a color scheme for items on display to maintain a cohesive look. For example, a set of glass jars with spices or colorful dishes can make the shelves feel intentional and stylish.

5. Use Hooks for Hanging

Hooks are a great way to free up drawer space in a small kitchen. Use hooks to hang mugs, pots, and pans, or even small baskets. Hang them on the wall, the side of cabinets, or under shelves to save counter and drawer space while keeping essentials accessible.

6. Maximize Natural Light

A well-lit space feels bigger and more welcoming, so take advantage of any windows. Keep window treatments minimal to let in as much light as possible. If natural light is limited, use bright LED lighting under cabinets or above countertops to illuminate the kitchen and make it feel more open.

7. Go for Compact Appliances

When space is tight, opt for smaller appliances. Slim refrigerators, compact microwaves, and narrow dishwashers are all available and designed to fit small kitchens. These appliances save precious space without sacrificing functionality, allowing you to keep your countertop free for food prep and decor.

8. Decorate with Plants

Plants add a touch of life to any space, including small kitchens. Consider small potted herbs, such as basil, mint, or rosemary, which add both beauty and utility. Hang them from the ceiling, place them on a windowsill, or set them on a shelf to save counter space. If you’re limited on sunlight, go for low-light plants like pothos or snake plants.

9. Invest in Clear Containers

Clear containers can streamline your pantry and keep your shelves looking clean and organized. Choose matching containers for ingredients like pasta, grains, or snacks. Not only will this add a cohesive look, but it also saves space by helping you stack items neatly.

10. Decorate with a Stylish Rug or Runner

Adding a colorful or patterned rug can give your kitchen a pop of personality and warmth. Choose a durable, easy-to-clean material that can handle spills and frequent foot traffic. A narrow runner can make the kitchen feel longer, adding visual interest to the floor space.


Final Thoughts: Make Every Inch Count

In a small kitchen, the right decor can make all the difference in both style and function. By focusing on practical storage solutions, thoughtful decor, and a cohesive color scheme, you can create a kitchen that feels open, organized, and beautifully put-together.

Looking for the perfect pieces to enhance your small kitchen? Check out our selection of kitchen decor essentials here.

How to Use a Rug Doctor Carpet Cleaner for Fresh, Clean Carpets

How to Use a Rug Doctor Carpet Cleaner for Fresh, Clean Carpets

If your carpets are in need of a deep clean, using a Rug Doctor carpet cleaner can be an effective and easy way to get professional-level results at home. This guide will walk you through the steps of using a Rug Doctor to refresh your carpets, along with some helpful tips to get the best outcome.

Step 1: Prepare the Room and Vacuum Thoroughly

Before you start cleaning, clear the room of any furniture and items that could get in the way. Then, vacuum the carpet thoroughly to remove surface dirt, dust, and debris. This makes the cleaning process more effective, as the machine will only need to tackle the deep-down grime.

Step 2: Pre-Treat Stains (If Necessary)

For areas with heavy staining, use a carpet stain remover to pre-treat spots before you start cleaning. Spray the stain remover on the stain and let it sit for a few minutes. This helps lift tough stains, making it easier for the Rug Doctor to remove them completely.

Step 3: Fill the Rug Doctor with Cleaning Solution and Water

Most Rug Doctor models have two tanks – one for clean water and one for the dirty water it picks up.

  1. Fill the clean water tank: Start by filling the tank with hot water up to the designated line. Hot water helps loosen dirt and stains more effectively.
  2. Add the cleaning solution: Pour the recommended amount of Rug Doctor carpet cleaning solution into the tank. Follow the instructions on the solution bottle for accurate measurements.

Step 4: Adjust the Machine Settings and Begin Cleaning

Turn on the Rug Doctor and set it to the carpet cleaning mode. Position the machine at the beginning of the area you want to clean, and slowly pull the machine back toward you. Make sure to press the spray button, which releases the cleaning solution onto the carpet. Move at a slow, steady pace for even coverage, letting the machine scrub and extract dirt as you go.

Pro Tip: Avoid going over the same spot multiple times, as this can lead to over-wetting. Instead, make one pass in each direction for the most effective results.

Step 5: Empty and Refill the Tank as Needed

The Rug Doctor will fill the dirty water tank as it cleans, so keep an eye on it. When it’s full, turn off the machine and empty the dirty water tank. Refill the clean water tank as needed and continue cleaning until you’ve covered the entire carpet area.

Step 6: Let the Carpet Dry Completely

Once you’ve finished, allow your carpet to dry fully before moving furniture back into the room or walking on it. To speed up drying, open windows or use fans to increase airflow. Most carpets will dry within 2-4 hours, but thicker carpets may take longer.

Step 7: Post-Cleaning Maintenance

When you’re done, make sure to clean the Rug Doctor’s tanks and brushes to prevent any residue build-up. Empty any remaining water from the clean and dirty water tanks, rinse them out, and let them dry completely before storing the machine.


Helpful Tips for Using a Rug Doctor Carpet Cleaner
  1. Test in a Hidden Spot: Always test the cleaning solution in an inconspicuous area to ensure it won’t discolor your carpet.
  2. Avoid Over-Saturating: Too much water can soak the carpet and padding, leading to longer drying times or mildew. Stick to a single pass for each area.
  3. Use the Right Solution: Only use Rug Doctor-approved solutions for the best results and to avoid damaging the machine or your carpet.

Ready to Freshen Up Your Home?

A clean carpet can completely transform a room, making it feel fresh, cozy, and inviting. Whether you’re doing a seasonal deep clean or tackling stubborn stains, a Rug Doctor is a powerful tool to have in your cleaning arsenal. Now that you know how to use it, you can bring new life to your carpets and keep your home looking and feeling its best.

Need a new rug to complement your freshly cleaned carpet? Check out our curated selection of beautiful, high-quality rugs here.

Maximize Your Kitchen Space: Creative Basket Storage Ideas

Maximize Your Kitchen Space: Creative Basket Storage Ideas

Keeping your kitchen organized can make cooking and meal prep much smoother, and storage baskets are a stylish yet practical solution. Whether you’re dealing with limited space or simply want a more efficient setup, baskets can help you store essentials while adding a touch of charm to your kitchen. Here’s a guide to some clever basket storage ideas to help you make the most of your kitchen space.

1. Utilize Open Shelves with Wicker Baskets

If you have open shelving, wicker baskets can add a rustic, warm touch to your kitchen while hiding any clutter. Store non-perishable foods, like pasta, snacks, or canned goods, in labeled baskets to keep everything organized and easy to find. Plus, wicker baskets are lightweight, making them easy to pull out and put away.

Explore our selection of beautiful wicker baskets here.

2. Create a Produce Station with Wire Baskets

Wire baskets are perfect for storing fruits and vegetables since they allow air circulation, which helps keep produce fresh longer. Stackable wire baskets can save counter space, while wall-mounted options can turn empty walls into functional storage. Try organizing by produce type: keep onions, garlic, and potatoes in one basket, and apples, bananas, and other fruits in another.

3. Organize Pantry Shelves with Clear Plastic Baskets

Clear plastic baskets are fantastic for pantry organization because they allow you to see exactly what’s inside. Group similar items together – like spices, baking ingredients, or breakfast items – in their own labeled baskets. These baskets are easy to wipe clean and will make your pantry look neat and organized.

Shop for pantry organization baskets here.

4. Use Over-the-Cabinet Door Baskets for Extra Space

Cabinet doors offer untapped storage potential. Use over-the-door hanging baskets to store cleaning supplies, dish towels, or even cooking utensils. This method frees up drawer and counter space while keeping items close at hand. For the best organization, choose a sturdy metal or plastic basket that’s easy to access.

5. Store Utensils and Cutlery in Decorative Baskets

Decorative baskets aren’t just for display – they’re also functional! Place a basket on the countertop to hold commonly used cooking utensils, like spatulas, whisks, and tongs. Smaller baskets can be used inside drawers to organize cutlery or keep small kitchen tools, like peelers and measuring spoons, within easy reach.

6. Add Rolling Baskets for Flexible Storage

For a versatile storage solution, consider rolling baskets or trolley baskets. They can be used to store anything from spices and sauces to small kitchen appliances, and the wheels make them easy to move around as needed. Rolling baskets are ideal for kitchens that need flexible storage, as they can be tucked away when not in use.

7. Arrange Cleaning Supplies in a Sink Basket

Under-sink space can be tricky to organize, but a small basket or two can make a huge difference. Use a water-resistant basket to hold cleaning supplies, like sponges, brushes, and dish soap. Larger baskets can be used to keep spray bottles, garbage bags, and other cleaning essentials neat and accessible.

8. Use Small Baskets in Drawers for Organization

If you have large drawers, using small baskets inside them can prevent clutter and keep items grouped together. Arrange small baskets in a drawer to separate tea bags, condiment packets, or seasoning packets. This way, you’ll always know exactly where to find what you need without rummaging through the drawer.

9. Make Use of Counter Corners with Tiered Baskets

Tiered baskets help you maximize vertical space on your counter. Place them in the corner to store items you use daily, like spices, coffee pods, or tea bags, without taking up too much valuable countertop space. Tiered baskets are also perfect for adding a decorative touch to your kitchen, making your essentials easily accessible while looking stylish.

10. Try Lidded Baskets for Bulk Storage

If you buy in bulk, lidded baskets are an excellent way to store larger quantities of items like rice, flour, or pasta. Lidded baskets keep dust and pests away and make it easy to stack them, helping you save space in your pantry or on a shelf. Opt for clear labels on the lids for quick identification.

11. Create a Coffee or Tea Station with Baskets

Dedicate a spot in your kitchen for a coffee or tea station using a set of small baskets. Store coffee pods, tea bags, sugar packets, and other essentials together for a convenient setup. You can also add a basket with cups and stirrers to keep everything you need for your morning brew in one place.

12. Mount Hanging Baskets for Extra Storage

If you’re short on counter or cabinet space, wall-mounted hanging baskets can provide additional storage without taking up any surface area. They’re perfect for holding small potted herbs, spice jars, or even recipe books, creating a vertical storage solution that’s both practical and visually appealing.


Final Tips for Kitchen Basket Storage Success

  1. Label Everything: Labels are key for keeping a well-organized space. Use clear labels to identify each basket’s contents so everyone in the household can easily find what they need.
  2. Choose Baskets that Match Your Style: Basket storage doesn’t just have to be practical – it can be stylish, too! Pick baskets that match your kitchen’s decor, whether you prefer a rustic, modern, or minimalist look.
  3. Think Beyond the Kitchen: Baskets are versatile and can be moved to other rooms if needed. If your storage needs change, don’t hesitate to repurpose a basket for other uses around the house.
  4. Rotate Seasonal Items: Use baskets to store seasonal kitchen items, like holiday cookie cutters or grilling tools, and rotate them as needed. This keeps your kitchen storage relevant to the season without overcrowding.

With these basket storage ideas, you can turn your kitchen into an organized and efficient space. From organizing your pantry to making the most of underused areas, baskets offer a flexible and attractive storage solution that will keep your kitchen essentials tidy and within reach. Try out some of these ideas to find the best storage solutions for your kitchen needs!

Creative ways to use basket at home

Creative Ways to Use Baskets in Your Home

Baskets aren’t just for storing random odds and ends—they’re incredibly versatile decor pieces that can add style and organization to any room. Here are some fresh, creative ideas for using baskets to elevate your space!

1. Stylish Storage for the Living Room

  • Use baskets to keep extra blankets and throw pillows within reach. A large, woven basket near the sofa can make the space feel cozy and organized.
  • Small, decorative baskets on side tables are perfect for remote controls, magazines, or chargers—keeping everything neat yet accessible.

2. Organized Pantry and Kitchen

  • Baskets work wonders in the pantry for corralling spices, snacks, or produce like potatoes and onions.
  • You can even use labeled baskets to create a system for meal prepping ingredients—perfect for grabbing and going on busy mornings!

3. Bathroom Essentials with a Spa-Like Touch

  • Place small baskets on the counter or shelves to organize toiletries, hand towels, or makeup, giving your bathroom a spa-inspired feel.
  • Larger baskets under the sink can hold extra toilet paper or cleaning supplies, making everything accessible without cluttering the space.

4. Bedroom Storage and Decor

  • Baskets can serve as unique bedside tables, doubling as storage for extra blankets or bedtime books.
  • Use a small basket for jewelry, eyeglasses, or other personal items on your nightstand, adding a cozy, natural texture to the decor.

5. Kid’s Room Organization Made Easy

  • Keep toys, stuffed animals, and books tidy with large baskets that blend with the room’s aesthetic. They’re easy for kids to use and make cleanup fun.
  • For small items like crayons or small figurines, place mini baskets on low shelves for easy access.

6. Entryway Catch-All

  • A basket in the entryway is a convenient spot for shoes, umbrellas, or bags, keeping things off the floor and ready for when you’re on the go.
  • Use smaller baskets on wall-mounted shelves to organize keys, mail, and sunglasses so nothing is misplaced.

7. Laundry and Utility Rooms

  • Invest in a large, durable basket for laundry, or get a few to separate whites, colors, and delicates.
  • Smaller baskets can hold detergent, dryer sheets, and other supplies, keeping the space orderly and visually appealing.

8. Outdoor and Garden Charm

  • For outdoor spaces, use baskets to store gardening tools or to display potted plants. Woven baskets add a natural touch to any balcony or patio.
  • Smaller baskets can be used to organize seeds, gloves, and small tools on shelves or a workbench in a shed.

9. Decorative Wall Art

  • Use flat woven baskets to create a unique wall display. Arrange them in a cluster for a rustic, bohemian vibe that adds texture and color to your wall.
  • Mix and match sizes, colors, and textures for a dynamic look that complements your decor style.

Baskets are more than just storage—they can transform any room in your home with style and function. Try these ideas to add a cozy, organized, and natural touch to your living spaces. Check out The Basket Store for a variety of beautiful, quality baskets to suit every space.

How to Choose the Right Vase for Your Flowers

How to Choose the Right Vase for Your Flowers

Choosing the perfect vase for your flowers can make a big difference in how they look and last. With so many shapes, sizes, and styles to choose from, picking the right one might seem daunting, but it doesn’t have to be! Here’s a guide to help you choose the ideal vase for every bouquet, so your flowers always look beautifully arranged and stand out in any space.

1. Start with the Shape of the Vase

The shape of your vase plays a huge role in how your flowers will be displayed. Different shapes complement different flower arrangements, and selecting one that matches the style of your flowers can elevate the whole look.

  • Cylinder Vase: Perfect for long-stemmed flowers like roses, lilies, and sunflowers. Its tall, narrow shape allows stems to stand upright and is versatile for both small and large bouquets.
  • Round or Fishbowl Vase: Great for flowers with shorter stems or fuller arrangements, like tulips, hydrangeas, or peonies. The wide opening allows the blooms to fan out naturally.
  • Bud Vase: Best for single stems or a few delicate flowers like wildflowers, orchids, or small roses. Bud vases are small, allowing the flower to take center stage.
  • Hourglass Vase: With a narrow neck and wider base, this style is great for bouquets with mixed heights. The slim middle holds stems together, creating a structured, balanced look.

2. Match the Vase Height to the Flowers

Height is crucial when selecting a vase. A vase that’s too short can make flowers look floppy, while one that’s too tall can overshadow them. A general rule of thumb is to choose a vase that’s about half the height of your flowers. This ensures the flowers stand out without the vase taking over.

For example:

  • Tall flowers (like sunflowers or gladiolus) need taller vases to support their length.
  • Medium flowers (like roses or dahlias) work well in medium-height vases, usually between 8 to 10 inches tall.
  • Short flowers (like ranunculus or anemones) are perfect for short, round vases or even bud vases.

3. Consider the Vase Opening

The size of the opening at the top of the vase determines how your flowers will be displayed and supported. A wide opening allows the flowers to spread out, while a narrow opening keeps the stems closer together.

  • Wide Opening: Perfect for full bouquets or flower arrangements where you want the blooms to fan out and create a lush look. Use with flowers that have broader heads, like hydrangeas or peonies.
  • Narrow Opening: Best for delicate flowers or minimalist arrangements where you want a structured, clean look. Narrow openings are ideal for a few tall stems or smaller bouquets, keeping them upright and secure.

4. Choose a Color that Complements Your Flowers

The vase color can either enhance or detract from your arrangement. Clear glass vases are versatile and showcase the flowers and stems without distraction, while colored or opaque vases can create a more dramatic effect.

  • Clear Glass Vases: These are classic and versatile, allowing the natural beauty of the flowers to shine through. They work well with any flower color or arrangement style.
  • White or Neutral Vases: Perfect for modern and minimalist arrangements, they complement bright flowers and help create a soft, elegant aesthetic.
  • Bold or Colored Vases: For a vibrant look, match colored vases with neutral-colored flowers. A red or blue vase with white flowers creates a striking contrast, while a green or amber vase can add warmth and richness.

5. Think About the Flower Style and Type

Different types of flowers have unique shapes, sizes, and textures that work better with certain vase styles. Here are some popular flower types and the best vases to pair them with:

  • Roses: Work beautifully in medium or tall cylinder vases or hourglass vases that offer support while letting the blooms take center stage.
  • Peonies and Hydrangeas: These full, rounded flowers look great in short, round vases or wide-mouthed vases that let them fan out naturally.
  • Tulips: These delicate, flowing stems pair well with cylindrical or round vases, which give them room to spread out slightly without overwhelming their natural curve.
  • Wildflowers: Perfect for bud vases or small mason jars, as they often have varying stem heights and textures. The small opening keeps them bunched and tidy, accentuating their natural beauty.

6. Consider Your Home’s Style and Decor

The vase you choose should also complement your home’s decor style. The right vase not only enhances the flowers but also ties in with your room’s aesthetic.

  • Modern or Minimalist Spaces: Opt for sleek, clear, or neutral-colored vases with clean lines. Cylindrical or rectangular shapes are great for a modern feel.
  • Rustic or Boho Decor: Mason jars, vintage pitchers, or ceramic vases with textured surfaces pair well with natural and rustic decor, giving your flowers a cozy, relaxed vibe.
  • Classic or Traditional Style: Choose elegant, curved vases or ornate glass vases with intricate patterns. Crystal or porcelain vases add a touch of sophistication.
  • Eclectic or Artistic Spaces: Feel free to experiment with unique, eye-catching vase shapes or bold colors. A uniquely shaped vase can be a statement piece, adding personality to your floral arrangement.

7. Keep Practicality in Mind

While style is important, practicality should not be overlooked. For example:

  • Easy to Clean: Some vases, especially those with narrow necks, can be tricky to clean. Opt for a vase that you can easily access with a brush or sponge if needed.
  • Stable Base: Ensure the vase has a sturdy base that won’t easily tip over, especially if you’re arranging tall flowers or heavy bouquets.
  • Reusable and Versatile: Look for vases that can work with various arrangements so you can get multiple uses out of them.

Final Tips for Choosing and Using the Right Vase

  • Mix and Match: Don’t be afraid to mix different vase styles for a creative display, especially if you have multiple arrangements in one room.
  • Experiment with Water Levels: For certain flowers, filling the vase halfway can add stability to stems and create an interesting visual effect.
  • Trim Your Flowers: Always trim stems at an angle before placing them in water, and remove any leaves that would be submerged to keep the arrangement fresh longer.

Choosing the right vase for your flowers can transform any floral arrangement into a stunning centerpiece. By considering factors like shape, height, color, and style, you’ll create beautiful displays that enhance both the flowers and your home decor. Whether you’re showcasing a bouquet of roses, a handful of wildflowers, or a lush bunch of peonies, the right vase will elevate your arrangement, making your flowers look their best.


Ready to pick the perfect vase? Check out this elegant vase selection to find a style that suits your flowers and home perfectly!

Save Money! Energy-Efficient Lighting Tips for Your Home

Save Money! Energy-Efficient Lighting Tips for Your Home

Looking to save money while making your home greener? One of the easiest and most effective ways to cut down on energy use—and lower your electricity bill—is by switching to energy-efficient lighting. Lighting can account for a significant portion of your home’s energy consumption, so making a few changes can lead to big savings. Here’s a roundup of some practical tips to help you make the switch to energy-efficient lighting.

1. Choose LED Bulbs

If you haven’t switched to LEDs yet, this is your first step. LED (Light Emitting Diode) bulbs use at least 75% less energy than incandescent bulbs and can last up to 25 times longer. While LED bulbs may have a higher upfront cost, they’ll more than make up for it with the savings on your energy bills and their long lifespan. LED bulbs are available in various color temperatures, from warm to cool, so you can pick the one that best suits each room’s purpose and ambiance.

2. Consider Smart Lighting Systems

Smart lighting is not only convenient but also energy-efficient. Many smart lighting systems allow you to control your lights remotely through a smartphone app, set schedules for when lights should turn on and off, or even adjust brightness levels. Some smart bulbs are equipped with sensors that turn lights off when a room is empty, further reducing energy waste.

3. Use Task Lighting

Instead of flooding an entire room with light, consider using task lighting. For example, use a desk lamp when working, reading, or writing rather than relying on overhead lights. In the kitchen, under-cabinet lighting can provide ample light for food preparation without lighting up the whole room. By focusing light only where it’s needed, you’ll reduce overall energy use and create a more comfortable environment.

4. Go for Dimmer Switches

Dimmer switches offer more control over your lighting, which can help lower energy consumption. Lowering the brightness level reduces the energy used by the bulb, and it also extends the bulb’s life. Make sure your bulbs are dimmable, as not all LEDs work with dimmers, and some may flicker or hum.

5. Maximize Natural Light

Harnessing natural light is a simple, free way to brighten your home. Open up blinds and curtains during the day to let in sunlight instead of turning on artificial lights. Placing mirrors strategically around the house can help bounce natural light deeper into the room, making the space feel brighter without any added cost.

6. Use Timers and Motion Sensors

If you frequently forget to turn off lights, timers and motion sensors can be a great addition to your home. Timers automatically turn off lights after a set period, and motion sensors detect activity to turn lights on or off. These are especially useful for outdoor lighting, closets, garages, and other areas where lights don’t need to stay on constantly.

7. Optimize Light Placement

Think about where you place your light fixtures and lamps. A well-placed light can make a room brighter without the need for multiple fixtures. For instance, ceiling lights or wall sconces can illuminate a larger area. In the living room, placing a lamp in a corner can help reflect light across two walls, creating more light coverage with fewer fixtures.

8. Recycle Old Bulbs Properly

When transitioning to energy-efficient lighting, don’t forget to dispose of your old bulbs properly. Many older bulbs, like CFLs (compact fluorescent lamps), contain mercury and should not be thrown away in regular household trash. Look for recycling centers or programs in your area that accept used bulbs to ensure proper disposal.

9. Experiment with Color Temperature

Choosing the right color temperature for each space can help set the mood and make the most of your lighting. For example, cooler white light (5000K) is ideal for workspaces like kitchens and offices as it mimics daylight, while warmer white light (2700K-3000K) is great for bedrooms and living areas, creating a cozy, relaxed atmosphere. Finding the right balance of color temperature across your home can make rooms feel brighter and more inviting.

10. Prioritize High-Traffic Areas

If switching all your lights to energy-efficient options at once isn’t feasible, prioritize high-traffic areas first. Focus on rooms where lights are used most frequently, such as kitchens, bathrooms, living rooms, and outdoor areas. This approach can maximize savings without the need for a complete home overhaul.

Upgrading your lighting to more energy-efficient solutions doesn’t have to be overwhelming or costly. Start with small changes, like replacing your most-used bulbs with LEDs, and gradually work your way through the house. The benefits of energy-efficient lighting go beyond saving money—they’re better for the environment and help reduce your carbon footprint. By making these changes, you can enjoy a brighter, more sustainable home and see a difference in your monthly energy bills.

(more…)

What to Look for in Quality Furniture: A Guide to Making Lasting Investments

What to Look for in Quality Furniture: A Guide to Making Lasting Investments

When it comes to furniture, quality is everything. High-quality furniture not only enhances the style and comfort of your home but also offers durability and value for your investment. However, with so many options out there, it can be overwhelming to identify what truly makes a piece of furniture worth buying. Here’s a guide on what to look for in quality furniture so you can shop with confidence and furnish your home with pieces that will last.

1. Solid Wood Construction

Furniture made from solid wood is often more durable and offers better value than furniture made with cheaper materials like particleboard or MDF. Solid wood, such as oak, walnut, cherry, and maple, is more resistant to wear and tear and ages beautifully over time.

Tip: Look for “kiln-dried” hardwoods, which are less likely to warp or crack. Avoid pieces made from veneered particleboard or fiberboard, as they can chip and scratch easily.

2. Sturdy Joinery Techniques

The joinery of a piece determines how well it will hold up to everyday use. Look for solid joinery techniques like dovetail, mortise-and-tenon, or finger joints, which are indicators of quality craftsmanship. These methods create strong connections without relying solely on glue or nails, making the piece more resilient.

Red flags: Be cautious of furniture that uses staples or visible glue to keep pieces together. This can be a sign of poor-quality construction that may not withstand heavy use.

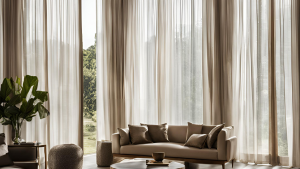
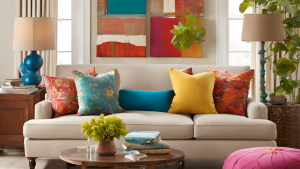
3. Comfortable, High-Quality Upholstery

For upholstered pieces like sofas and chairs, comfort is just as important as durability. Quality upholstery includes sturdy, well-made fabrics that feel good to the touch and wear well over time. Look for dense foam cushions that are wrapped in layers of fiber or down, as they’ll maintain their shape and provide support without sagging.

Tip: Fabrics like linen, wool, leather, and certain synthetics are durable choices. For added longevity, consider furniture with removable cushion covers, which are easier to clean and replace.

4. Well-Constructed Frames

The frame is the foundation of any piece of furniture, and quality frames are built to last. For sofas, chairs, and beds, opt for frames made from kiln-dried hardwood, which is less likely to warp or crack than softer woods or composites.

Test it: Try lifting one corner of the sofa or chair—if it twists or squeaks, it may not be very sturdy. A quality piece should feel solid and stable when moved.

5. Attention to Detail in Finish and Hardware

The finish of a piece of furniture contributes significantly to its longevity and appearance. High-quality finishes are smooth, free of streaks or bubbles, and provide a protective coating that resists scratches and fading.

Similarly, hardware like knobs, handles, and drawer glides should feel solid and operate smoothly. Metal hardware that’s welded rather than glued on, and drawers that glide smoothly without wobbling, are both good indicators of quality.

Tip: Look for finishes that enhance the natural grain of the wood rather than opaque colors that can hide defects.

6. Functional Design and Ergonomics

Furniture should not only look good but also be comfortable and functional. Chairs and sofas should have a depth and height that feel comfortable to sit in, with good back and lumbar support. Desks and tables should be at a height that’s comfortable for work or dining.

Pro tip: If possible, try sitting or using the furniture in-store to ensure it’s ergonomic. Quality pieces are not just stylish but are also designed with the user’s comfort in mind.

7. Properly Balanced Weight and Stability

Heavy furniture is often a sign of solid materials and good craftsmanship, but weight isn’t everything. A quality piece should be well-balanced and stable. For example, a heavy dresser shouldn’t tip over easily when you pull out a drawer, and a chair should feel evenly weighted without wobbling.

Tip: For items like bookshelves and cabinets, check if they include anti-tip hardware, which is a valuable safety feature for homes with children or pets.

8. Good Warranty or Guarantee

Quality furniture brands often stand behind their products with warranties or guarantees. Look for companies that offer coverage on frames, cushions, springs, and other components. A good warranty shows that the brand is confident in its craftsmanship and durability.

Tip: Be wary of brands that offer little to no warranty, as this may indicate low-quality manufacturing.

9. Sustainable and Ethical Materials

With environmental concerns top of mind, many people are choosing furniture made from sustainable, responsibly sourced materials. Look for certifications like FSC (Forest Stewardship Council) for wood and OEKO-TEX for textiles, which ensure eco-friendly and safe production practices.

Pro tip: Many high-quality brands prioritize ethical labor practices as well, so look for companies that are transparent about their manufacturing processes and labor standards.

10. Timeless Design and Style

Quality furniture is an investment, so it’s essential to select pieces with classic, timeless designs that won’t go out of style. Avoid overly trendy pieces that may not age well, and instead, choose styles that complement your home and personal taste long-term.

Tip: Neutral colors and simple, elegant designs tend to stay in style and can easily be updated with seasonal accents or accessories.

Investing in quality furniture is about more than just aesthetics; it’s about durability, comfort, and long-term value. By looking for solid construction, high-quality materials, and attention to detail, you’ll find pieces that stand the test of time. So, whether you’re furnishing your first apartment or upgrading your forever home, take the time to find quality furniture that you’ll love for years to come.


For inspiration, visit http://www.hellohomesng.com/product-category/furniture to explore a range of high-quality, stylish options for your home.

Home Interior Decor Tips

Home Interior Decor Tips: Easy Ways to Brighten Up Your Small Space

Brighten Up Your Small Space: Easy Home Interior Decor Tips

Small spaces can often feel cramped and dark. But with a few clever design tricks, you can transform your compact living area into a bright and airy haven. In this post, we’ll share some easy-to-follow interior decor tips to help you maximize your space and let in more light. From strategic furniture placement to the power of color, let’s dive into the world of small space decorating.

1. Embrace Light Colors

Lighter shades—think whites, pastels, and soft neutrals—reflect more light, creating an illusion of space. White walls are especially powerful in making a room feel open and airy, and adding subtle colors like blush pink, soft gray, or mint green can bring warmth without overwhelming the room.

Decor

Tip: Opt for light-colored furniture and décor items that complement the walls, enhancing the overall sense of brightness.

2. Maximize Natural Light

Nothing beats natural sunlight when it comes to brightening a room. Try to keep windows unobstructed by heavy drapes or bulky furniture. Instead, use sheer or light-colored curtains that allow sunlight to flow through, giving the room an inviting glow.

Home Interior Decor

Pro tip: If privacy is a concern, consider translucent blinds or frosted window films that let light in while still giving you peace of mind.

3. Use Mirrors to Reflect Light

Mirrors are a small-space staple for a reason—they reflect both natural and artificial light, creating a sense of depth and openness. Hang a large mirror opposite a window to maximize light, or arrange smaller mirrors in a gallery style to add a bit of personality.

Home Interior Decor

Tip: Mirrored furniture pieces like tables or cabinets can also brighten a space while adding a touch of modern sophistication.

4. Choose Multifunctional Furniture

In small spaces, less is often more, and multifunctional furniture can help keep things streamlined and spacious. Look for pieces like ottomans that double as storage, fold-out desks, or sofas that convert to beds. These items minimize clutter, giving the room a clean, open look.

Home Interior Decor

Tip: Floating shelves and wall-mounted desks save precious floor space, giving you the room to move without compromising functionality.

5. Incorporate Reflective and Light Materials

When selecting accessories or small furniture pieces, opt for those with light, reflective surfaces. Glass, acrylic, and light woods reflect light naturally and feel less visually dense. You can add reflective surfaces with glass coffee tables, glossy finishes on cabinets, or metallic accents like light fixtures.

decor

Pro tip: Clear acrylic or glass furniture blends seamlessly into a room, creating the illusion of more space without sacrificing style.

6. Layer Lighting

Good lighting can make or break a small space. Layer your lighting by combining ambient lighting (like overhead lights) with task lighting (such as desk or bedside lamps) and accent lighting (like wall sconces or LED strips). This creates depth and interest while ensuring that every corner is illuminated.

decor

Tip: Avoid harsh, overly bright lights; instead, go for warm or soft white bulbs that create a cozy, inviting atmosphere.

7. Play with Vertical Space

In a small room, every square inch counts—including your walls! Use vertical space to your advantage by installing floating shelves, tall bookcases, or wall-mounted storage units. This not only draws the eye upward, making the room feel taller, but also frees up floor space for a more open feel.

decor

Tip: Hanging plants are a great way to bring life to a room without taking up valuable surface space. Try low-maintenance varieties like pothos or string of pearls.

8. Add a Pop of Color with Small Accents

While keeping the base of the room light, add personality with colorful accents. Bright throw pillows, a vibrant rug, or an accent chair in a bold color can infuse energy into the room without making it feel cluttered. Just remember to keep the color scheme balanced to avoid overwhelming the space.

Home Interior Decor

Tip: Greenery is a perfect way to add a pop of color—small potted plants, succulents, or even a statement indoor plant can make the room feel fresh and lively.

9. Declutter and Keep It Simple

Less clutter means more room to breathe! Keep surfaces like counters, tables, and shelves free from excess items to help the room feel larger and brighter. Regularly declutter, keeping only what’s functional or brings you joy. When everything has a place, even a small space can feel luxurious.

Home Interior Decor Tips

Tip: Baskets, storage boxes, and organizers can keep items out of sight, maintaining a tidy, streamlined look.

10. Opt for Light and Airy Textiles

Heavy fabrics can make a space feel dark and closed-off, so choose lighter textiles. For instance, swap out heavy drapes for sheer curtains, or choose bedding and throws in cotton or linen for a breezy look. These materials help create a sense of lightness that’s perfect for small spaces.

Home Interior Decor Tips

Pro tip: Rugs in lighter shades or with subtle patterns can open up a room while still adding warmth and texture.

Brightening up a small space doesn’t require a major overhaul. By strategically choosing light colors, maximizing light sources, and keeping décor minimal, you can make any compact area feel inviting and spacious. With these tips, you’ll transform your small space into a bright, open retreat that feels larger than it is.

0
Back to Top

Search For Products

Product has been added to your cart