


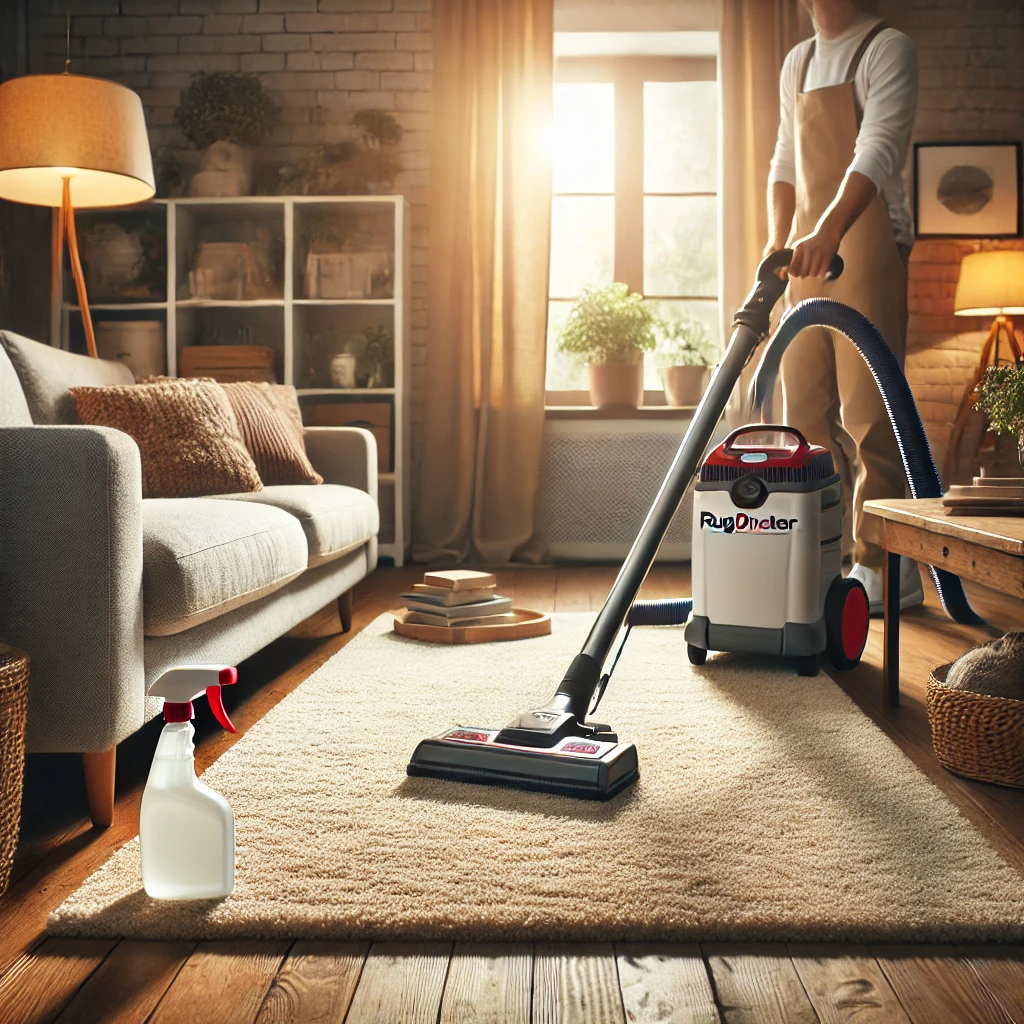
How to Use a Rug Doctor Carpet Cleaner for Fresh, Clean Carpets
If your carpets are in need of a deep clean, using a Rug Doctor carpet cleaner can be an effective and easy way to get professional-level results at home. This guide will walk you through the steps of using a Rug Doctor to refresh your carpets, along with some helpful tips to get the best outcome.
Step 1: Prepare the Room and Vacuum Thoroughly
Before you start cleaning, clear the room of any furniture and items that could get in the way. Then, vacuum the carpet thoroughly to remove surface dirt, dust, and debris. This makes the cleaning process more effective, as the machine will only need to tackle the deep-down grime.
Step 2: Pre-Treat Stains (If Necessary)
For areas with heavy staining, use a carpet stain remover to pre-treat spots before you start cleaning. Spray the stain remover on the stain and let it sit for a few minutes. This helps lift tough stains, making it easier for the Rug Doctor to remove them completely.
Step 3: Fill the Rug Doctor with Cleaning Solution and Water
Most Rug Doctor models have two tanks – one for clean water and one for the dirty water it picks up.
- Fill the clean water tank: Start by filling the tank with hot water up to the designated line. Hot water helps loosen dirt and stains more effectively.
- Add the cleaning solution: Pour the recommended amount of Rug Doctor carpet cleaning solution into the tank. Follow the instructions on the solution bottle for accurate measurements.
Step 4: Adjust the Machine Settings and Begin Cleaning
Turn on the Rug Doctor and set it to the carpet cleaning mode. Position the machine at the beginning of the area you want to clean, and slowly pull the machine back toward you. Make sure to press the spray button, which releases the cleaning solution onto the carpet. Move at a slow, steady pace for even coverage, letting the machine scrub and extract dirt as you go.
Pro Tip: Avoid going over the same spot multiple times, as this can lead to over-wetting. Instead, make one pass in each direction for the most effective results.
Step 5: Empty and Refill the Tank as Needed
The Rug Doctor will fill the dirty water tank as it cleans, so keep an eye on it. When it’s full, turn off the machine and empty the dirty water tank. Refill the clean water tank as needed and continue cleaning until you’ve covered the entire carpet area.
Step 6: Let the Carpet Dry Completely
Once you’ve finished, allow your carpet to dry fully before moving furniture back into the room or walking on it. To speed up drying, open windows or use fans to increase airflow. Most carpets will dry within 2-4 hours, but thicker carpets may take longer.
Step 7: Post-Cleaning Maintenance
When you’re done, make sure to clean the Rug Doctor’s tanks and brushes to prevent any residue build-up. Empty any remaining water from the clean and dirty water tanks, rinse them out, and let them dry completely before storing the machine.
Helpful Tips for Using a Rug Doctor Carpet Cleaner
- Test in a Hidden Spot: Always test the cleaning solution in an inconspicuous area to ensure it won’t discolor your carpet.
- Avoid Over-Saturating: Too much water can soak the carpet and padding, leading to longer drying times or mildew. Stick to a single pass for each area.
- Use the Right Solution: Only use Rug Doctor-approved solutions for the best results and to avoid damaging the machine or your carpet.
Ready to Freshen Up Your Home?
A clean carpet can completely transform a room, making it feel fresh, cozy, and inviting. Whether you’re doing a seasonal deep clean or tackling stubborn stains, a Rug Doctor is a powerful tool to have in your cleaning arsenal. Now that you know how to use it, you can bring new life to your carpets and keep your home looking and feeling its best.
Need a new rug to complement your freshly cleaned carpet? Check out our curated selection of beautiful, high-quality rugs here.
Leave a comment